Creating a Dynamic Contact Form with FluentForms: Custom Thank You Page and Redirect Setup.

I developed my contact form by setting up required input fields. Utilizing the {fluentform id=”1″} shortcode, I created a dedicated page titled “Contact.”
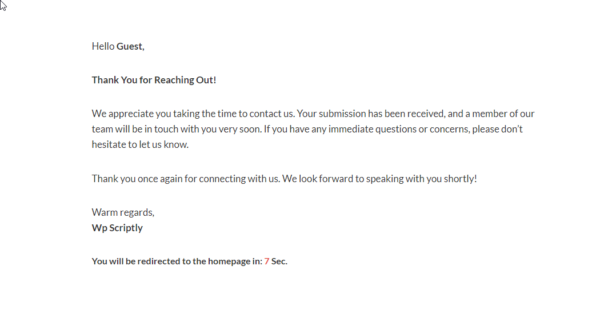
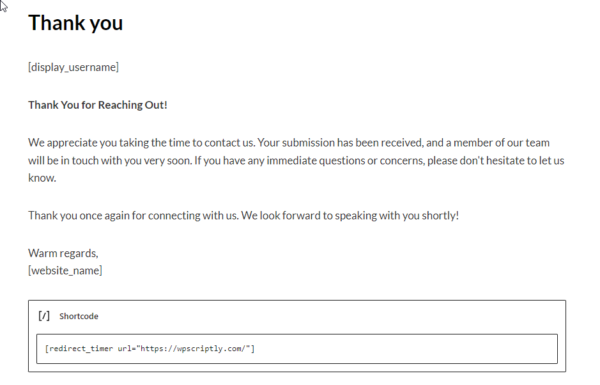
For the thank you page, I integrated my display_username shortcode at the top, followed by my website_name to close the message. Additionally, I incorporated a redirect shortcode provided by my script.
(Thank-you) Page Content
<p>[display_username]</p>
<p><strong>Thank You for Reaching Out!</strong></p>
<p>We appreciate you taking the time to contact us. Your submission has been received, and a member of our team will be in touch with you very soon. If you have any immediate questions or concerns, please don't hesitate to let us know.</p>
<p>Thank you once again for connecting with us. We look forward to speaking with you shortly!</p>
<p>Warm regards,<br>[website_name]</p>
[redirect_timer url="https://wpscriptly.com/"]
Lastly, within the settings of fluentform id 1, I navigated to Confirmation Settings and selected “Confirmation Type: To a Page.” I then designated the previously created thank you page.
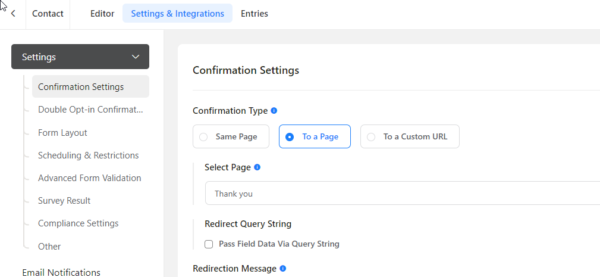
Now, upon form submission, users are directed to the thank you page, where, after a set duration, they are automatically redirected to the homepage.
Shortcode:
[redirect_timer url="https://wpscriptly.com/"]Live Demo: https://wpscriptly.com/contact/


Add your first comment to this post
You must be logged in to post a comment.